Summary #
- Wallets store your secret key and allow users to sign transactions
- Hardware wallets store your secret key on a separate device
- Software wallets use your computer for secure storage. On desktops, software wallets are often browser extensions that add the ability to connect to a wallet from a website. On mobile, wallet apps have their own browsers.
- Solana’s Wallet Adapter allows you to build websites that can request a user’s wallet address and propose transactions for them to sign
Lesson #
Wallets #
In the previous two lessons, we discussed keypairs. Keypairs are used to locate accounts and sign transactions. While the public key of a keypair is perfectly safe to share, the secret key should always be kept in a secure location. If a user’s secret key is exposed, then a malicious actor could execute transactions with the authority of that user, allowing them to transfer all the assets inside.
A “wallet” refers to anything that stores a secret key to keep it secure. These secure storage options can generally be described as either “hardware” or “software” wallets. Hardware wallets are storage devices that are separate from your computer. Software wallets are applications you can install on your existing device(s).
- On mobile, software wallets are typically mobile apps, installed through the iOS App Store or Google Play. These include their own web browsers.
- On desktop, software wallets often come in the form of a browser extension.
Both techniques allow websites to interact easily with the wallet, for example:
- Seeing the wallet’s wallet address (their public key)
- Submitting transactions for a user's approval to sign
- Sending signed transactions to the network
Signing transactions requires using your secret key. By letting a site submit a transaction to your wallet and having the wallet handle the signing, you ensure that you never expose your secret key to the website. Instead, you only share the secret key with the wallet application.
Unless you’re creating a wallet application yourself, your code should never need to ask a user for their secret key. Instead, you can ask users to connect to your site using a reputable wallet.
Solana’s Wallet Adapter #
If you build web apps, and need users to be able to connect to their wallets and sign transactions through your apps, you'll want Solana’s Wallet Adapter. Wallet Adapter is a suite of modular packages:
- The core functionality is found in
@solana/wallet-adapter-base. - React support is added by
@solana/wallet-adapter-react. - Additional packages provide components for common UI frameworks. In this
lesson, and throughout this course, we’ll be using components from
@solana/wallet-adapter-react-ui.
Finally, some packages are adapters for specific wallet apps. These are now no longer necessary in most cases - see below.
Install Wallet-Adapter Libraries for React #
When adding wallet support to an existing React app, you start by installing the
appropriate packages. You’ll need @solana/wallet-adapter-base,
@solana/wallet-adapter-react. If you plan to use the provided React
components, you'll also need to add @solana/wallet-adapter-react-ui.
All wallets that support the Wallet Standard are supported out of the box, and all the popular Solana wallets support the Wallet Standard. However, if you wish to add support for any wallets that don't support the standard, add a package for them.
npm install @solana/wallet-adapter-base \
    @solana/wallet-adapter-react \
@solana/wallet-adapter-react-uiWe're learning doing this manually to learn about Wallet Adapter, but you can also use create-solana-dapp to create a brand new React or NextJS app that supports Solana wallets.
Connect To Wallets #
@solana/wallet-adapter-react allows us to persist and access wallet connection
states through hooks and context providers, namely:
useWalletWalletProvideruseConnectionConnectionProvider
For these to work properly, any use of useWallet and useConnection should be
wrapped in WalletProvider and ConnectionProvider. One of the best ways to
ensure this is to wrap your entire app in ConnectionProvider and
WalletProvider:
import { NextPage } from "next";
import { FC, ReactNode } from "react";
import {
  ConnectionProvider,
  WalletProvider,
} from "@solana/wallet-adapter-react";
import * as web3 from "@solana/web3.js";

export const Home: NextPage = props => {
  const endpoint = web3.clusterApiUrl("devnet");
  const wallets = useMemo(() => [], []);

  return (
    <ConnectionProvider endpoint={endpoint}>
      <WalletProvider wallets={wallets}>
        <p>Put the rest of your app here</p>
      </WalletProvider>
    </ConnectionProvider>
  );
};
Note that ConnectionProvider requires an endpoint property and that
WalletProvider requires a wallets property. We’re continuing to use the
endpoint for the Devnet cluster, and since all major Solana wallet applications
support the Wallet Standard, we don't need any wallet-specific adapters. At this
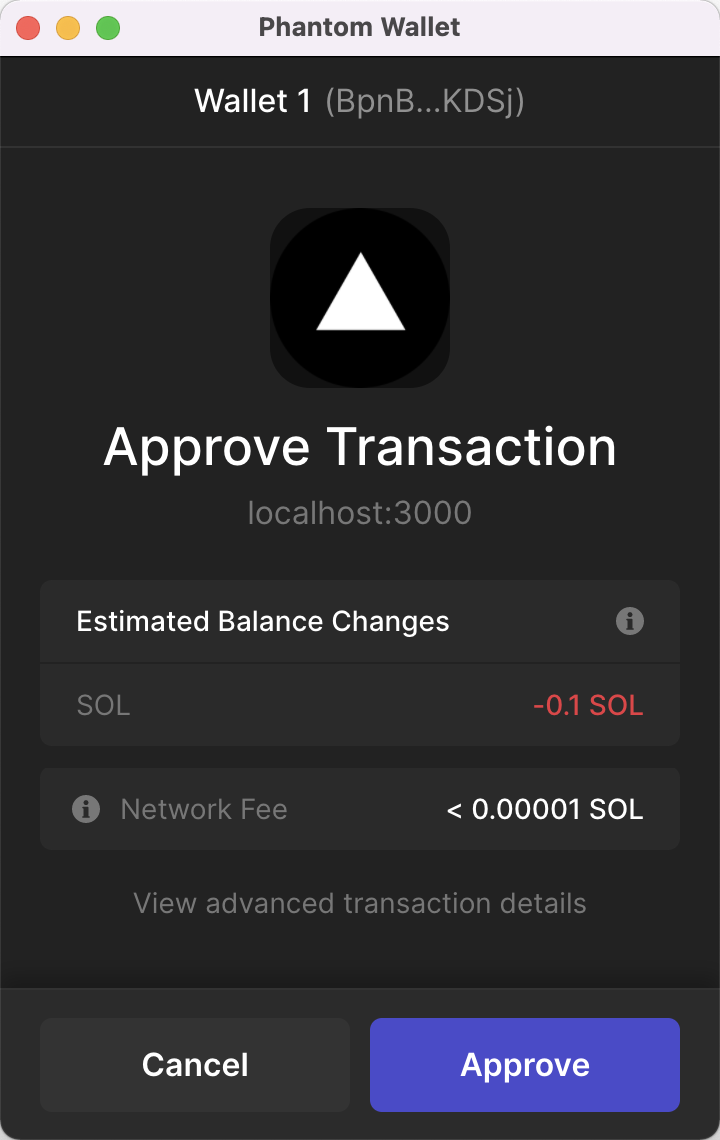
point, you can connect with wallet.connect(), which will instruct the wallet
to prompt the user for permission to view their public key and request approval
for transactions.
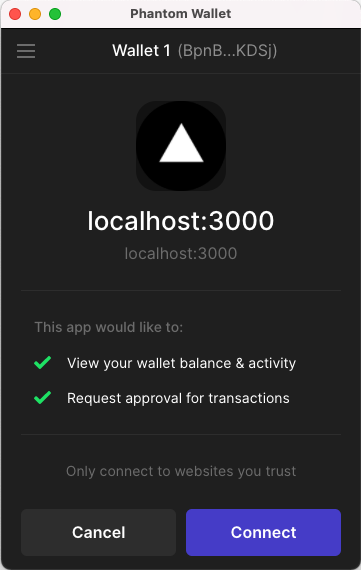 wallet connection prompt
While you could do this in a useEffect hook, you’ll usually want to provide
more sophisticated functionality. For example, you may want users to be able to
choose from a list of supported wallet applications or disconnect after they’ve
already connected.
@solana/wallet-adapter-react-ui #
You can create custom components for this, or you can leverage components
provided by @solana/wallet-adapter-react-ui. The simplest way to provide a
full-featured wallet experience is to use WalletModalProvider and
WalletMultiButton:
import { NextPage } from "next";
import { FC, ReactNode } from "react";
import {
  ConnectionProvider,
  WalletProvider,
} from "@solana/wallet-adapter-react";
import {
  WalletModalProvider,
  WalletMultiButton,
} from "@solana/wallet-adapter-react-ui";
import * as web3 from "@solana/web3.js";

const Home: NextPage = props => {
  const endpoint = web3.clusterApiUrl("devnet");
  const wallets = useMemo(() => [], []);

  return (
    <ConnectionProvider endpoint={endpoint}>
      <WalletProvider wallets={wallets}>
        <WalletModalProvider>
          <WalletMultiButton />
          <p>Put the rest of your app here</p>
        </WalletModalProvider>
      </WalletProvider>
    </ConnectionProvider>
  );
};

export default Home;
The WalletModalProvider adds functionality for presenting a modal screen for
users to select which wallet they’d like to use. The WalletMultiButton changes
behavior to match the connection status:
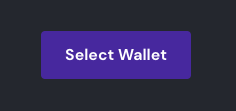 multi button select wallet option
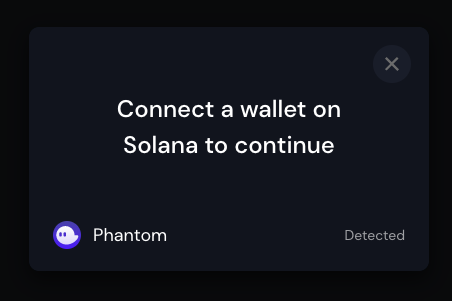 connect wallet modal
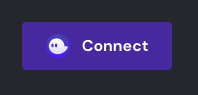 multi button connect options
 multi button connected state
You can also use more granular components if you need more specific functionality:
WalletConnectButtonWalletModalWalletModalButtonWalletDisconnectButtonWalletIcon
Access Account Info #
Once your site is connected to a wallet, useConnection will retrieve a
Connection object and useWallet will get the WalletContextState.
WalletContextState has a property publicKey that is null when not
connected to a wallet and has the public key of the user’s account when a wallet
is connected. With a public key and a connection, you can fetch account info and
more.
import { useConnection, useWallet } from "@solana/wallet-adapter-react";
import { LAMPORTS_PER_SOL } from "@solana/web3.js";
import { FC, useEffect, useState } from "react";

export const BalanceDisplay: FC = () => {
  const [balance, setBalance] = useState(0);
  const { connection } = useConnection();
  const { publicKey } = useWallet();

  useEffect(() => {
    if (!connection || !publicKey) {
      return;
    }

    connection.onAccountChange(
      publicKey,
      updatedAccountInfo => {
        setBalance(updatedAccountInfo.lamports / LAMPORTS_PER_SOL);
      },
      "confirmed",
    );

    connection.getAccountInfo(publicKey).then(info => {
      setBalance(info.lamports);
    });
  }, [connection, publicKey]);

  return (
    <div>
      <p>{publicKey ? `Balance: ${balance / LAMPORTS_PER_SOL} SOL` : ""}</p>
    </div>
  );
};
Note the call to connection.onAccountChange(), which updates the account balance shown once the network confirms the transaction.
Send Transactions #
WalletContextState also provides a sendTransaction function that you can use
to submit transactions for approval.
const { publicKey, sendTransaction } = useWallet();
const { connection } = useConnection();

const sendSol = async event => {
  event.preventDefault();

  const transaction = new web3.Transaction();
  const recipientPubKey = new web3.PublicKey(event.target.recipient.value);

  const sendSolInstruction = web3.SystemProgram.transfer({
    fromPubkey: publicKey,
    toPubkey: recipientPubKey,
    lamports: 0.1 * LAMPORTS_PER_SOL,
  });

  transaction.add(sendSolInstruction);
  const signature = sendTransaction(transaction, connection);
  console.log(signature);
};
When this function is called, the connected wallet will display the transaction for the user’s approval. If approved, then the transaction will be sent.
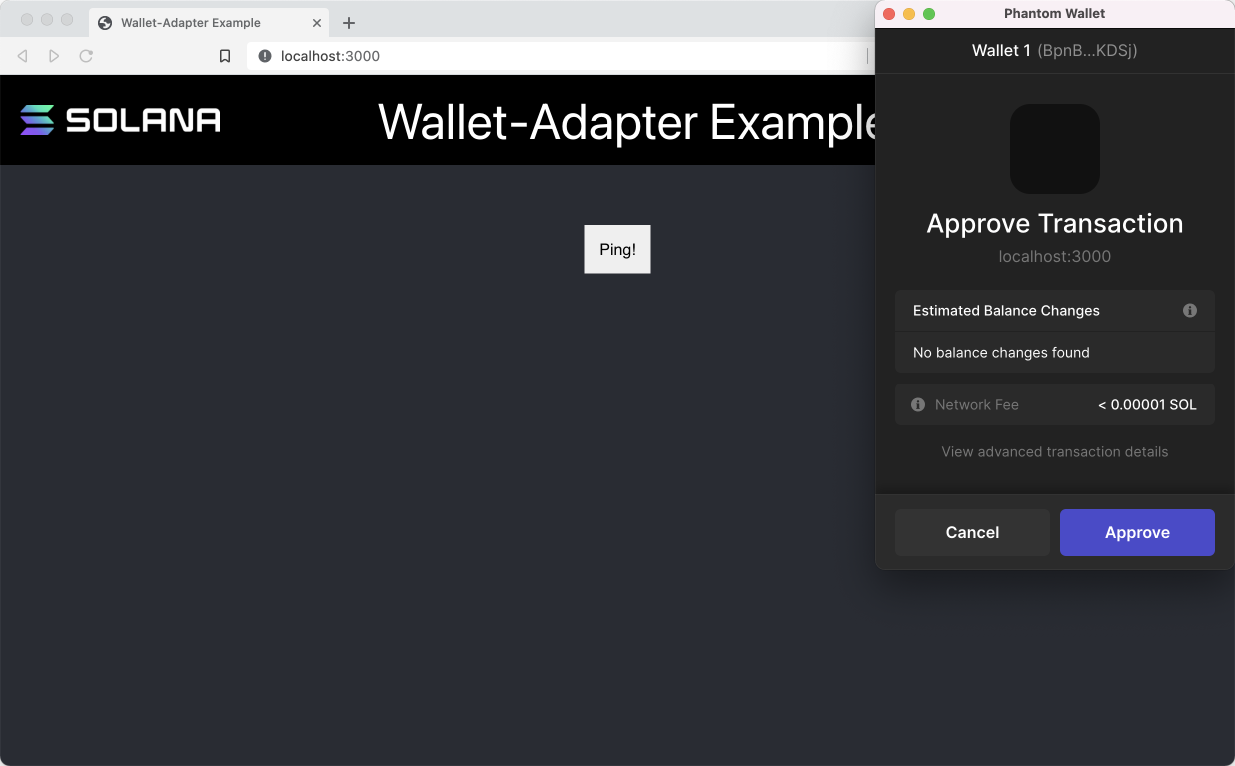
 wallet transaction approval prompt
Lab #
Let’s take the Ping program from the last lesson and build a frontend that lets
users approve a transaction that pings the program. As a reminder, the program’s
public key is ChT1B39WKLS8qUrkLvFDXMhEJ4F1XZzwUNHUt4AU9aVa and the public key
for the data account is Ah9K7dQ8EHaZqcAsgBW8w37yN2eAy3koFmUn4x3CJtod.
 Solana Ping App
Download a Solana wallet #
You'll need a Solana wallet app. There's a wide variety of Solana wallets available. We're going to use a browser-extension wallet in this case, since you probably code on a laptop or desktop!
Follow the wallets instructions for creating a new account and a new wallet.
Then set your wallet to use Devnet, for example:
- In Phantom, click Settings -> Developer Settings -> Testnet mode. 'Testnet mode' sets Solana to Devnet by default.
- In Solflare, click Settings -> General -> Network -> DevNet
- In Backpack, click Preferences -> Developer Mode
This ensures that your wallet app will be connected to the same network we’ll be using in this lab.
Download the starter code #
Download the
starter code for this project.
This project is a simple Next.js application. It’s mostly empty except for the
AppBar component. We’ll build the rest throughout this lab.
You can see its current state with the command npm run dev in the console.
Wrap the app in context providers #
To start, we’re going to create a new component to contain the various
Wallet-Adapter providers that we’ll be using. Create a new file inside the
components folder called WalletContextProvider.tsx.
Let’s start with some of the boilerplate for a functional component:
import { FC, ReactNode } from "react";

const WalletContextProvider: FC<{ children: ReactNode }> = ({ children }) => {
  return (

  ));
};

export default WalletContextProvider;
To properly connect to the user’s wallet, we’ll need a ConnectionProvider,
WalletProvider, and WalletModalProvider. Start by importing these components
from @solana/wallet-adapter-react and @solana/wallet-adapter-react-ui. Then
add them to the WalletContextProvider component. Note that
ConnectionProvider requires an endpoint parameter and WalletProvider
requires an array of wallets. For now, just use an empty string and an empty
array, respectively.
import { FC, ReactNode } from "react";
import {
  ConnectionProvider,
  WalletProvider,
} from "@solana/wallet-adapter-react";
import { WalletModalProvider } from "@solana/wallet-adapter-react-ui";

const WalletContextProvider: FC<{ children: ReactNode }> = ({ children }) => {
  return (
    <ConnectionProvider endpoint={""}>
      <WalletProvider wallets={[]}>
        <WalletModalProvider>{children}</WalletModalProvider>
      </WalletProvider>
    </ConnectionProvider>
  );
};

export default WalletContextProvider;
The last things we need are an actual endpoint for ConnectionProvider and the
supported wallets for WalletProvider.
For the endpoint, we’ll use the same clusterApiUrl function from the
@solana/web3.js library that we’ve used before so you’ll need to import it.
For the array of wallets you’ll also need to import the
@solana/wallet-adapter-wallets library.
After importing these libraries, create a constant endpoint that uses the
clusterApiUrl function to get the URL for Devnet. Then create a constant named
wallets and set it to an empty array - since all wallets support Wallet
Standard, we no longer need any custom wallet adapter. Finally, replace the
empty string and empty array in ConnectionProvider and WalletProvider,
respectively.
To complete this component, add
require('@solana/wallet-adapter-react-ui/styles.css'); below your imports to
ensure proper styling and behavior of the Wallet Adapter library components.
import { FC, ReactNode } from "react";
import {
  ConnectionProvider,
  WalletProvider,
} from "@solana/wallet-adapter-react";
import { WalletModalProvider } from "@solana/wallet-adapter-react-ui";
import * as web3 from "@solana/web3.js";
import * as walletAdapterWallets from "@solana/wallet-adapter-wallets";
require("@solana/wallet-adapter-react-ui/styles.css");

const WalletContextProvider: FC<{ children: ReactNode }> = ({ children }) => {
  const endpoint = web3.clusterApiUrl("devnet");
  const wallets = useMemo(() => [], []);

  return (
    <ConnectionProvider endpoint={endpoint}>
      <WalletProvider wallets={wallets}>
        <WalletModalProvider>{children}</WalletModalProvider>
      </WalletProvider>
    </ConnectionProvider>
  );
};

export default WalletContextProvider;
Add wallet multi-button #
Next, let’s set up the Connect button. The current button is just a placeholder
because rather than using a standard button or creating a custom component,
we’ll be using Wallet-Adapter’s “multi-button.” This button interfaces with the
providers we set up in WalletContextProvider and let’s users choose a wallet,
connect to a wallet, and disconnect from a wallet. If you ever need more custom
functionality, you can create a custom component to handle this.
Before we add the “multi-button,” we need to wrap the app in the
WalletContextProvider. Do this by importing it in index.tsx and adding it
after the closing </Head> tag:
import { NextPage } from "next";
import styles from "../styles/Home.module.css";
import WalletContextProvider from "../components/WalletContextProvider";
import { AppBar } from "../components/AppBar";
import Head from "next/head";
import { PingButton } from "../components/PingButton";

const Home: NextPage = props => {
  return (
    <div className={styles.App}>
      <Head>
        <title>Wallet-Adapter Example</title>
        <meta name="description" content="Wallet-Adapter Example" />
      </Head>
      <WalletContextProvider>
        <AppBar />
        <div className={styles.AppBody}>
          <PingButton />
        </div>
      </WalletContextProvider>
    </div>
  );
};

export default Home;
If you run the app, everything should still look the same since the current
button on the top right is still just a placeholder. To remedy this, open
AppBar.tsx and replace <button>Connect</button> with <WalletMultiButton/>.
You’ll need to import WalletMultiButton from
@solana/wallet-adapter-react-ui.
import { FC } from "react";
import styles from "../styles/Home.module.css";
import Image from "next/image";
import { WalletMultiButton } from "@solana/wallet-adapter-react-ui";

export const AppBar: FC = () => {
  return (
    <div className={styles.AppHeader}>
      <Image src="/solanaLogo.png" height={30} width={200} />
      <span>Wallet-Adapter Example</span>
      <WalletMultiButton />
    </div>
  );
};
At this point, you should be able to run the app and interact with the multi-button at the top-right of the screen. It should now read, "Select Wallet." If you have the a wallet installed, you should be able to use this button to connect your wallet to the site.
Create button to ping program #
Now that our app can connect to our wallet, let’s make the “Ping!” button actually do something.
Start by opening the PingButton.tsx file. We’re going to replace the
console.log inside of onClick with code that will create a transaction and
submit it to the wallet app for the end user’s approval.
First, we need a connection, the wallet’s public key, and Wallet-Adapter’s
sendTransaction function. To get this, we need to import useConnection and
useWallet from @solana/wallet-adapter-react. While we’re here, let’s also
import @solana/web3.js since we’ll need it to create our transaction.
import { useConnection, useWallet } from "@solana/wallet-adapter-react";
import * as web3 from "@solana/web3.js";
import { FC, useState } from "react";
import styles from "../styles/PingButton.module.css";

export const PingButton: FC = () => {
  const onClick = () => {
    console.log("Ping!");
  };

  return (
    <div className={styles.buttonContainer} onClick={onClick}>
      <button className={styles.button}>Ping!</button>
    </div>
  );
};
Now use the useConnection hook to create a connection constant and the
useWallet hook to create publicKey and sendTransaction constants.
import { useConnection, useWallet } from "@solana/wallet-adapter-react";
import * as web3 from "@solana/web3.js";
import { FC, useState } from "react";
import styles from "../styles/PingButton.module.css";

export const PingButton: FC = () => {
  const { connection } = useConnection();
  const { publicKey, sendTransaction } = useWallet();

  const onClick = () => {
    console.log("Ping!");
  };

  return (
    <div className={styles.buttonContainer} onClick={onClick}>
      <button className={styles.button}>Ping!</button>
    </div>
  );
};
With that, we can fill in the body of onClick.
First, check that both connection and publicKey exist (if either does not
then the user’s wallet isn’t connected yet).
Next, construct two instances of PublicKey, one for the program ID
ChT1B39WKLS8qUrkLvFDXMhEJ4F1XZzwUNHUt4AU9aVa and one for the data account
Ah9K7dQ8EHaZqcAsgBW8w37yN2eAy3koFmUn4x3CJtod.
Next, construct a Transaction, then a new TransactionInstruction that
includes the data account as a writable key.
Next, add this instruction to the transaction.
Finally, call sendTransaction.
const onClick = async () => {
  if (!connection || !publicKey) {
    return;
  }

  const programId = new web3.PublicKey(PROGRAM_ID);
  const programDataAccount = new web3.PublicKey(DATA_ACCOUNT_PUBKEY);
  const transaction = new web3.Transaction();

  const instruction = new web3.TransactionInstruction({
    keys: [
      {
        pubkey: programDataAccount,
        isSigner: false,
        isWritable: true,
      },
    ],
    programId,
  });

  transaction.add(instruction);
  const signature = await sendTransaction(transaction, connection);
  console.log(sig);
};
And that’s it! If you refresh the page, connect your wallet, and click the ping button, your wallet should present you with a popup to confirm the transaction.
Add some polish #
There’s a lot you could do to make the user experience here even better. For example, you could change the UI to only show you the Ping button when a wallet is connected and display some other prompt otherwise. You could link to the transaction on Solana Explorer after a user confirms a transaction so they can easily go look at the transaction details. The more you experiment with it, the more comfortable you’ll get, so get creative!
You can also download the full source code from this lab to understand all of this in context.
Challenge #
Now it’s your turn to build something independently. Create an application that lets a user connect their wallet and send SOL to another account.
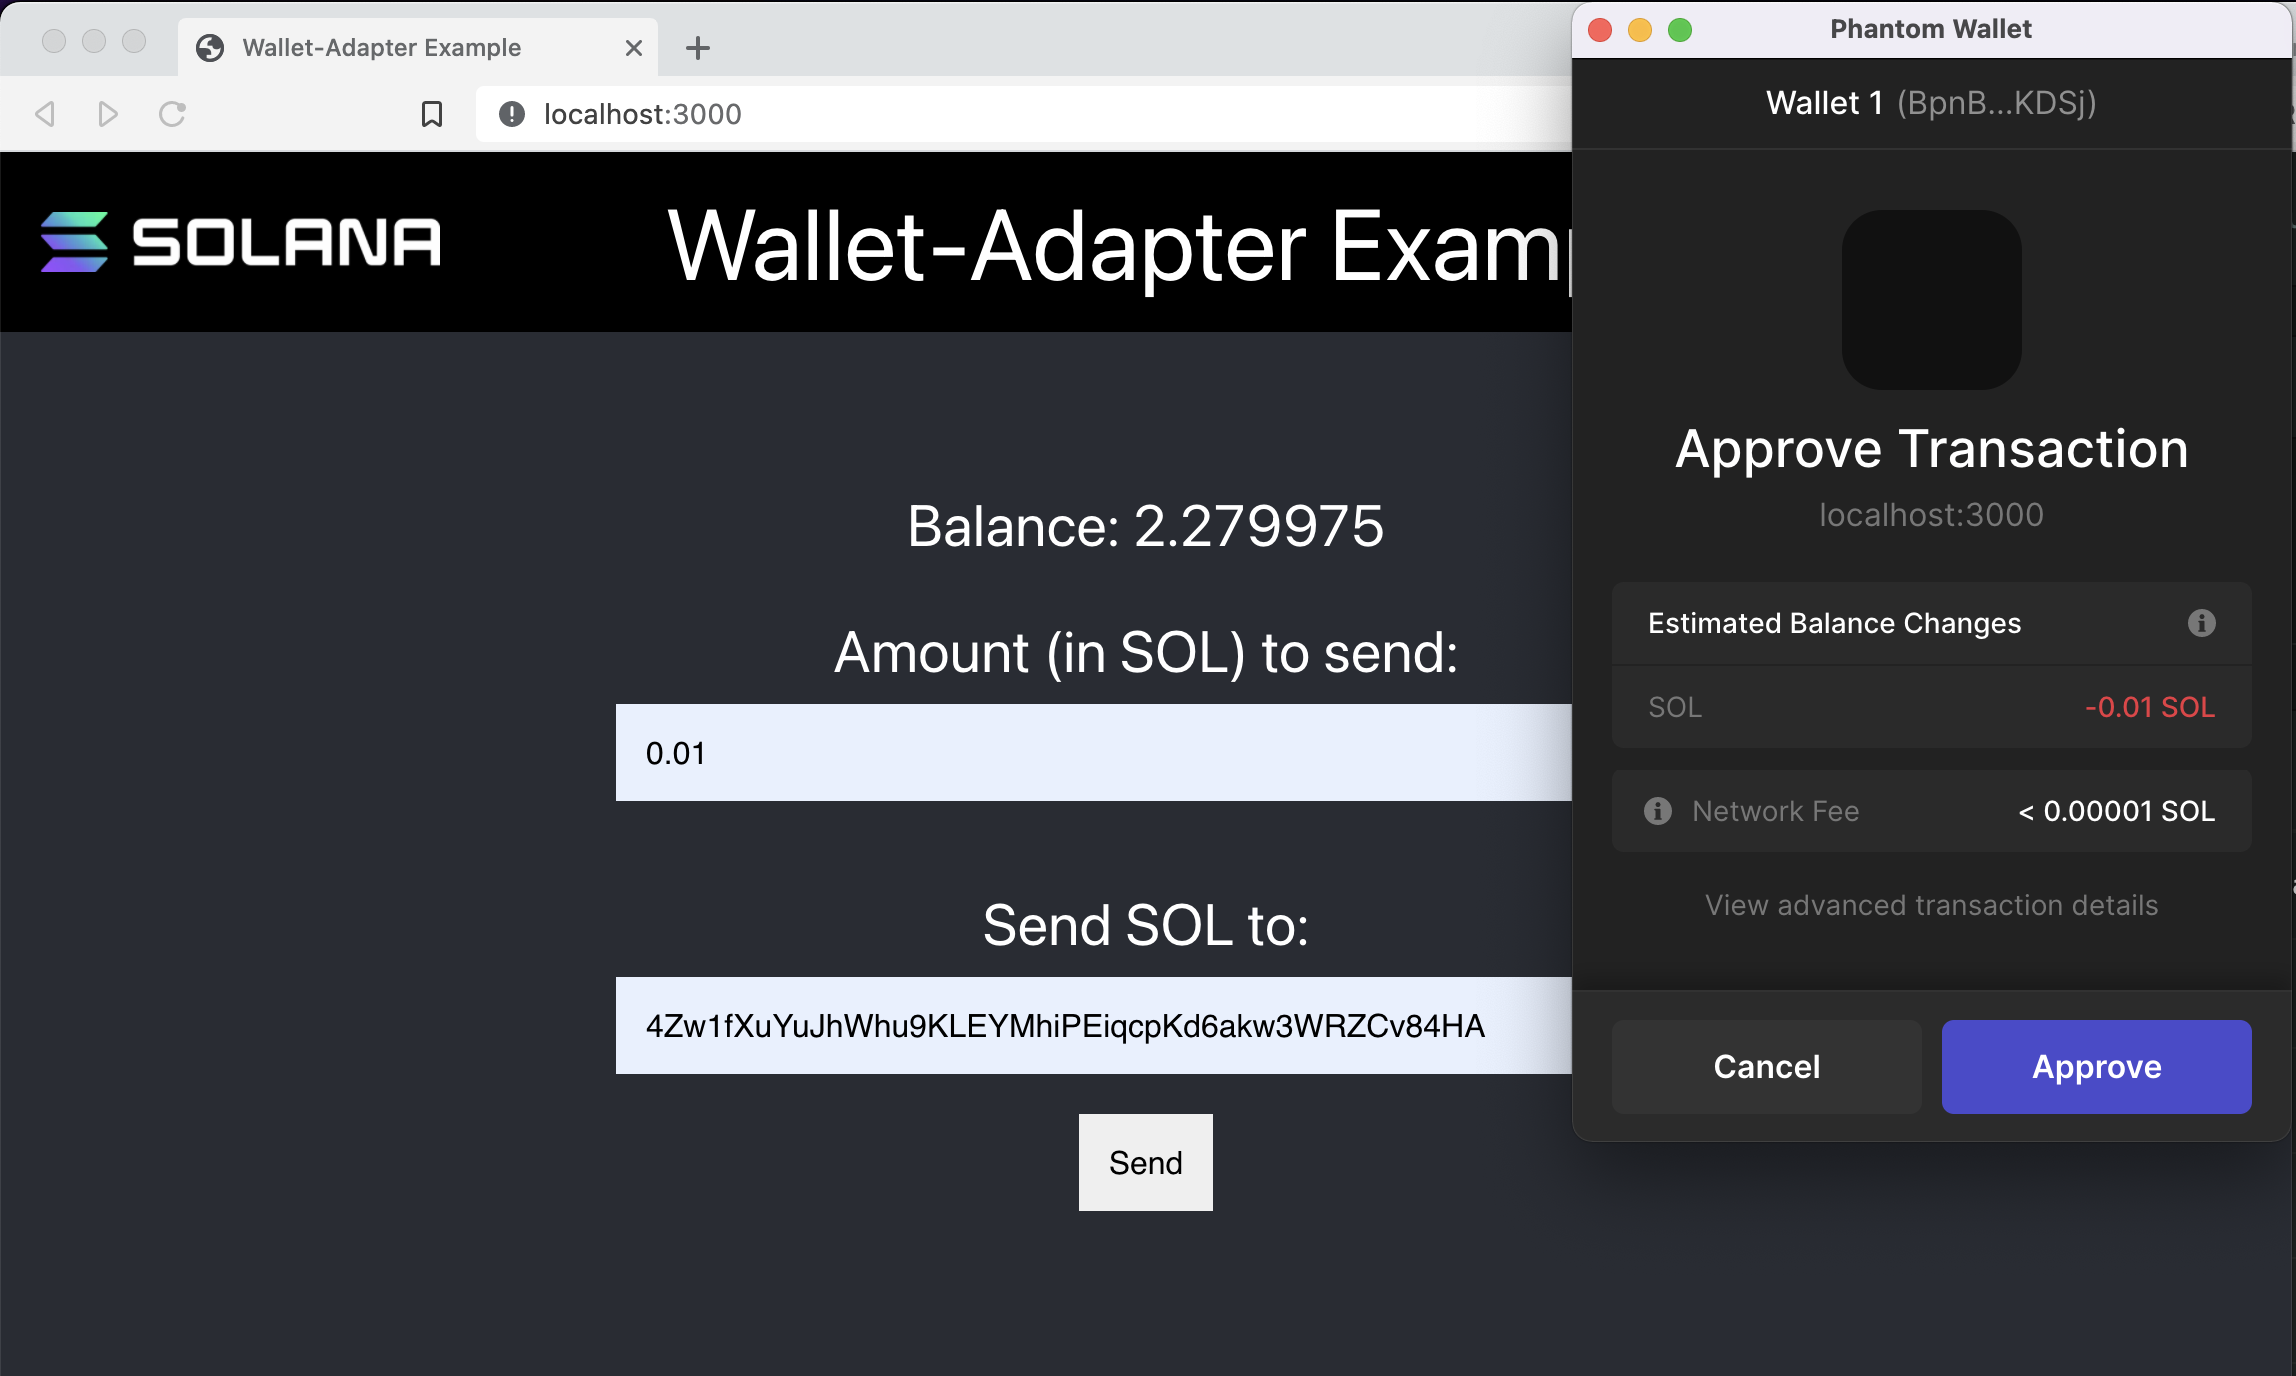 Send SOL App
- You can build this from scratch or you can download the starter code.
- Wrap the starter application in the appropriate context providers.
- In the form component, set up the transaction and send it to the user’s wallet for approval.
- Get creative with the user experience. Add a link to let the user view the transaction on Solana Explorer or something else that seems cool to you!
If you get really stumped, feel free to check out the solution code.