For this "hello world" quickstart guide, we will use Solana Playground, a browser-based IDE to develop and deploy our Solana program. To use it, you do NOT have to install any software on your computer. Simply open Solana Playground in your browser of choice, and you are ready to write and deploy Solana programs.
What you will learn #
- how to get started with Solana Playground
- how to create a Solana wallet on Playground
- how to program a basic Solana program in Rust
- how to build and deploy a Solana Rust program
- how to interact with your onchain program using JavaScript
Using Solana Playground #
Solana Playground is browser-based application that will let you write, build, and deploy onchain Solana programs. All from your browser. No installation needed.
It is a great developer resource for getting started with Solana development, especially on Windows.
Import our example project #
In a new tab in your browser, open our example "Hello World" project on Solana Playground
Next, import the project into your local workspace by clicking the "Import"
icon and naming your project hello_world.
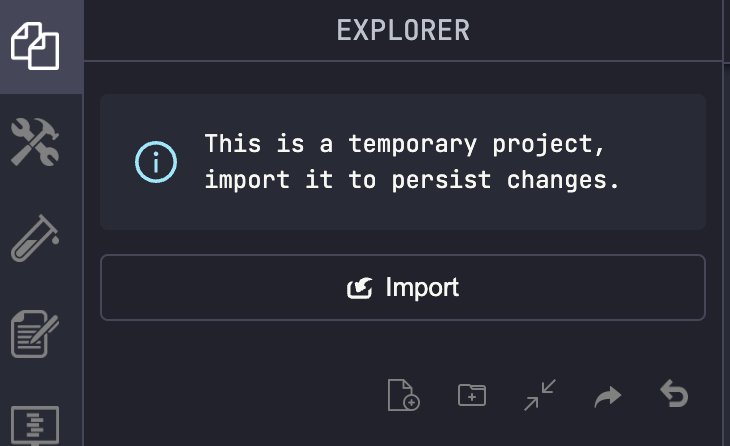 Import Hello World project
If you do not import the program into your Solana Playground, then you will not be able to make changes to the code. But you will still be able to build and deploy the code to a Solana cluster.
Create a Playground wallet #
Normally with local development, you will need to create a file system wallet for use with the Solana CLI. But with the Solana Playground, you only need to click a few buttons to create a browser-based wallet.
Your Playground Wallet will be saved in your browser's local storage. Clearing your browser cache will remove your saved wallet. When creating a new wallet, you will have the option to save a local copy of your wallet's keypair file.
Click on the red status indicator button at the bottom left of the screen, (optionally) save your wallet's keypair file to your computer for backup, then click "Continue".
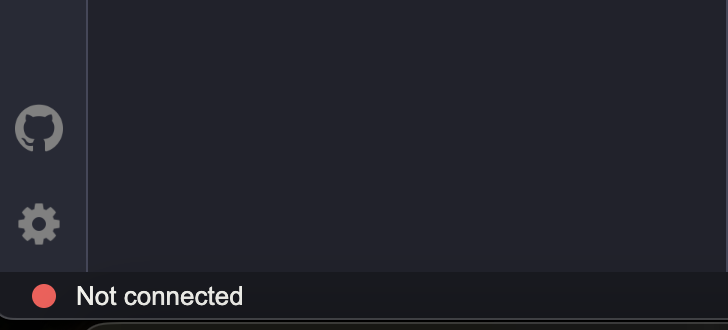 Connect your playground wallet
After your Playground Wallet is created, you will notice the bottom of the window now states your wallet's address, your SOL balance, and the Solana cluster you are connected to (Devnet is usually the default/recommended, but a "localhost" test validator is also acceptable).
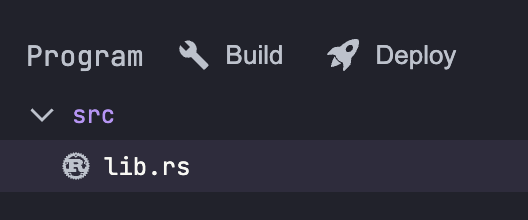
Create a Solana program #
The code for your Rust based Solana program will live in your src/lib.rs file.
Inside src/lib.rs you will be able to import your Rust crates and define your
logic. Open your src/lib.rs file within Solana Playground.
Import the solana_program crate #
At the top of lib.rs, we import the solana-program crate and bring our
needed items into the local namespace:
use solana_program::{
    account_info::AccountInfo,
    entrypoint,
    entrypoint::ProgramResult,
    pubkey::Pubkey,
    msg,
};
Write your program logic #
Every Solana program must define an entrypoint that tells the Solana runtime
where to start executing your onchain code. Your program's entrypoint should
provide a public function named process_instruction:
// declare and export the program's entrypoint
entrypoint!(process_instruction);

// program entrypoint's implementation
pub fn process_instruction(
    program_id: &Pubkey,
    accounts: &[AccountInfo],
    instruction_data: &[u8]
) -> ProgramResult {
    // log a message to the blockchain
    msg!("Hello, world!");

    // gracefully exit the program
    Ok(())
}
Every onchain program should return the Ok
result enum with a value of (). This
tells the Solana runtime that your program executed successfully without errors.
Our program above will simply log a message of "Hello, world!" to the
blockchain cluster, then gracefully exit with Ok(()).
Build your program #
On the left sidebar above the lib.rs file click the Build button.
If you look at the Playground's terminal, you should see your Solana program begin to compile. Once complete, you will see a success message.
 Build and Deploy
Deploy your program #
You can click the "Deploy" button to deploy your first program to the Solana blockchain. Specifically to your selected cluster (e.g. Devnet, Testnet, etc).
After each deployment, you will see your Playground Wallet balance change. By default, Solana Playground will automatically request SOL airdrops on your behalf to ensure your wallet has enough SOL to cover the cost of deployment.
If you need more devnet SOL in order to deploy your program, you can airdrop more by typing the airdrop command in the playground terminal:
solana airdrop 2If you get a rate limit error when requesting devnet SOL you can also you can
just type run in the terminal and you will get a link to a
web faucet. You can also find your wallet
address at the bottom of the playground window.
You should see a Deployment successful message similar to this:
 Deploy Success
Instead of using the buttons in playground you can also type build and
deploy in the terminal as well. For a list of all commands you can use in
the terminal you can type help.
Congratulations! #
You have successfully setup, built, and deployed a Solana program using the Rust language directly in your browser. Next, we will demonstrate how to interact with your onchain program to actually see our 'Hello World'.
Interact with your onchain program #
Once you have successfully deployed a Solana program to the blockchain, you will want to be able to interact with that program.
Like most developers creating dApps and websites, we will interact with our on
chain program using JavaScript. Specifically, will use the open source
NPM package @solana/web3.js
to aid in our client application.
This web3.js package is an abstraction layer on top of the JSON RPC API that reduced the need for rewriting common boilerplate, helping to simplify your client side application code.
The JavaScript client #
Now let's take a look at how to actually call our program. The example comes
with a JavaScript client that will call our hello world program. You can find
the client.ts file on the left-hand side of the playground.
Call the program #
To execute your onchain program, you must send a transaction to the network. Each transaction submitted to the Solana blockchain contains a list of instructions.
Here we create a new transaction and add a single instruction to it:
// create an empty transaction
const transaction = new web3.Transaction();

// add a hello world program instruction to the transaction
transaction.add(
  new web3.TransactionInstruction({
    keys: [],
    programId: new web3.PublicKey(pg.PROGRAM_ID),
  }),
);
Each instruction must include all the keys involved in the operation and the
program ID we want to execute. In this example keys is empty because our
program only logs hello world and doesn't need any accounts.
With our transaction created, we can submit it to the cluster:
// send the transaction to the Solana cluster
console.log("Sending transaction...");
const txHash = await web3.sendAndConfirmTransaction(
  pg.connection,
  transaction,
  [pg.wallet.keypair],
);
console.log("Transaction sent with hash:", txHash);The first signer in the signers array is the transaction fee payer by default.
We are signing with our keypair pg.wallet.keypair.
Run the application #
Now that you know how the client works, you can run the code via the run
command. Just type it in the playground terminal and press enter.
runOnce your application completes, you will see output similar to this:
$ run
Running client...
  client.ts:
    ProgramID:  C7JcX81YDaDJ9Bf8ebifLgBSqfKJxETek6qyTuPGJE1f
    Transaction sent with hash: m7f7dszzdNshMZo5u2gRKjbyURk1tQHj7Hmeh3AbH7wUdnmDXmCJhA8cXJjYwVN7foJaLQiPYhEFTn6F5mWSeCb
    Congratulations! Look at your transaction in the Solana Explorer:
  https://explorer.solana.com/tx/m7f7dszzdNshMZo5u2gRKjbyURk1tQHj7Hmeh3AbH7wUdnmDXmCJhA8cXJjYwVN7foJaLQiPYhEFTn6F5mWSeCb?cluster=devnet
You can now click on the link provided to view your transaction in the Solana
Explorer. If you scroll to the bottom you should see Hello, world! in the
Log Messages section of the program output. 🎉
Congratulations!!! #
You have now written a Solana program, deployed it to devnet and called the program. You are now a Solana developer!
PS: Try to update your program's message then re-build, re-deploy, and re-execute your program.
Look at the deployed program #
Now that we called our program let's have a look at the account where the program is actually saved.
When executing a program using web3.js
or from another Solana program, you will need to provide
the program id (aka public address of your program).
Inside Solana Playground's Build & Deploy sidebar, you can find your
program id under the Program Credentials dropdown.
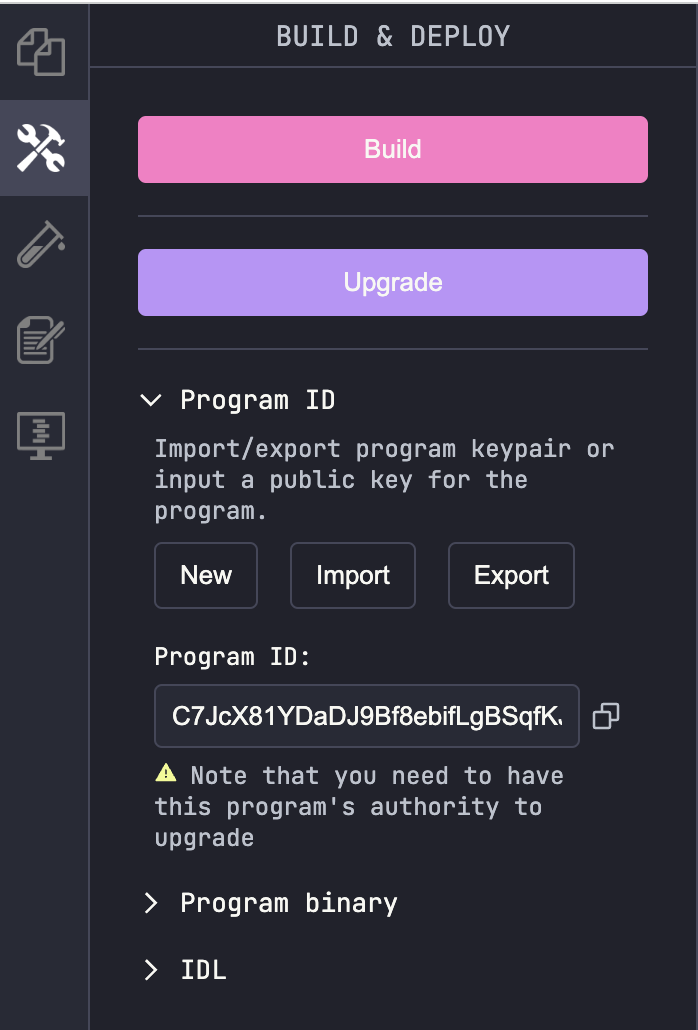 Find Program Id
You can copy this program id and look at your program in the solana explorer by pasting the address into the search bar.
Playground globals #
In playground, there are many utilities that are globally available for us to
use without installing or setting up anything. Most important ones for our
hello world program are web3 for @solana/web3.js and pg for Solana
Playground utilities.
You can go over all of the available globals by pressing Ctrl+Space (or
Cmd+Space on macOS) inside the editor.
Next steps #
See the links below to learn more about writing Solana programs, and setting up your local development environment: