Summary #
- Program state is stored in other accounts, not in the program itself.
- State is stored in Program Derived Address (PDA) accounts, which are generated from a program ID and optional seeds. The data within a PDA is defined by the programmer.
- Creating an account requires calculating the necessary space and corresponding rent in lamports.
- A Cross Program Invocation (CPI) to the
create_accountinstruction handler on the System Program is needed to create a new account. - Updating the data field on an account involves serializing (converting to a byte array) the data into the account.
Lesson #
Solana maintains speed, efficiency, and extensibility by making programs stateless. Instead of storing state alongside the program's executable, programs use Solana's account model to read and write state to separate PDA accounts.
This model provides a simple, user-friendly key-value store for managing data and allows programs to be upgraded without affecting their data. However, if you're familiar with older blockchains, this might be challenging. In this lesson, we'll begin with the basics and gradually introduce more complex onchain programs. You'll learn the fundamentals of state management in a Solana program, including representing state as a Rust type, creating accounts using PDAs, and serializing account data.
Program State #
All Solana accounts have a data field that holds a byte array, making accounts as flexible as files on a computer. You can store anything in an account, as long as it has the necessary storage space.
Just like files in a traditional filesystem conform to specific formats like PDF or MP3, data stored in a Solana account must follow a pattern to be retrieved and deserialized into something usable.
Represent State as a Rust Type #
When writing a program in Rust, we typically create this "format" by defining a Rust data type. This is similar to how we created an enum to represent discrete instructions in the first part of deserialize instruction data lesson.
A simple struct is usually sufficient for most use cases. For example, a
note-taking program that stores notes in separate accounts might have fields for
a title, body, and an ID:
struct NoteState {
    title: String,
    body: String,
    id: u64
}
Using Borsh for Serialization and Deserialization #
Just as with instruction data, we need to convert our Rust data type to a byte array and vice versa. Serialization converts an object into a byte array, while deserialization reconstructs an object from a byte array.
We'll continue using Borsh for serialization and deserialization. In Rust, the
borsh crate provides the BorshSerialize and BorshDeserialize traits. We
apply these traits using the derive attribute macro:
use borsh::{BorshSerialize, BorshDeserialize};

#[derive(BorshSerialize, BorshDeserialize)]
struct NoteState {
    title: String,
    body: String,
    id: u64
}
These traits provide methods on NoteState for serializing and deserializing
data.
Creating Accounts #
Before we can update the data field of an account, we must first create the account.
To create a new account in our program, we need to:
- Calculate the space and rent required for the account.
- Determine an address for the new account.
- Invoke the system program to create the new account.
Space and rent #
Storing data on the Solana network requires users to allocate rent in the form of lamports. The required rent depends on the amount of space allocated to the account, so we must determine the space needed before creating the account.
Note that rent is more like a deposit; all lamports allocated for rent can be fully refunded when an account is closed. Additionally, all new accounts must be rent-exempt, meaning lamports are not deducted over time. An account is rent-exempt if it holds at least 2 years' worth of rent, ensuring accounts are stored onchain permanently until the owner closes the account and withdraws the rent.
In our note-taking app example, the NoteState struct has three fields:
title, body, and id. To calculate the required account size, we add up the
space needed for each field.
For dynamic data like strings, Borsh adds an additional 4 bytes to store the
field's length. This means title and body each require 4 bytes plus their
respective sizes. The id field is a 64-bit integer or 8 bytes.
We can add these lengths and calculate the required rent using the
minimum_balance function from the rent module of the solana_program crate:
// Calculate account size required for struct NoteState
let account_len: usize = (4 + title.len()) + (4 + body.len()) + 8;

// Calculate rent required
let rent = Rent::get()?;
let rent_lamports = rent.minimum_balance(account_len);
Program Derived Addresses (PDA) #
Before creating an account, we also need an address to assign the account. For
program-owned accounts, this will be a Program Derived Address (PDA) found using
the find_program_address function.
PDAs are derived using the program ID (the address of the program creating the
account) and optional seeds. The find_program_address function returns the
same address every time with the same inputs, allowing us to deterministically
create and find any number of PDA accounts.
The find_program_address function also provides a "bump seed" to ensure the
PDA doesn't have a corresponding secret key, making it secure for program
ownership. The function starts with a bump seed of 255, decreasing it until a
valid PDA is found.
For our note-taking program, we'll use the note creator's public key and the ID as seeds to derive the PDA. This allows us to deterministically find the account for each note:
let (note_pda_account, bump_seed) = Pubkey::find_program_address(&[note_creator.key.as_ref(), id.as_bytes().as_ref(),], program_id);Cross Program Invocation (CPI) #
Once we've calculated the rent and derived a valid PDA, we can create the
account using a Cross Program Invocation (CPI). A CPI is when one program
invokes an instruction on another program. To create a new account, we'll invoke
the create_account instruction on the system program.
CPIs can be done using either invoke or invoke_signed.
pub fn invoke(
    instruction: &Instruction,
    account_infos: &[AccountInfo<'_>]
) -> ProgramResult
pub fn invoke_signed(
instruction: &Instruction,
account_infos: &[AccountInfo<'_>],
signers_seeds: &[&[&[u8]]]
) -> ProgramResultIn this lesson, we'll explore invoke_signed, a function that allows a program
to authorize actions for a Program Derived Address (PDA) without using a
traditional secret key. Here's how it operates:
invoke_signedderives a PDA using seeds, a bump seed, and the program ID.- It compares this derived PDA against all accounts in the instruction.
- If an account matches the derived PDA, that account's signer field becomes true.
This method ensures security because invoke_signed generates the PDA using the
invoking program's ID, preventing other programs from producing matching PDAs to
authorize accounts derived with a different program ID. It's crucial to
understand that while we describe the PDA as "authorizing," it doesn't use a
secret key like traditional signatures. Instead, this mechanism enables programs
to approve actions onchain for PDA accounts they control.
invoke_signed(
    // instruction
    &system_instruction::create_account(
        note_creator.key,
        note_pda_account.key,
        rent_lamports,
        account_len.try_into().unwrap(),
        program_id,
    ),
    // account_infos
    &[note_creator.clone(), note_pda_account.clone(), system_program.clone()],
    // signers_seeds
    &[&[note_creator.key.as_ref(), note_id.as_bytes().as_ref(), &[bump_seed]]],
)?;
Serializing and Deserializing Account Data #
After creating an account, we need to update its data field by deserializing its byte array into the Rust type, updating the fields, and then serializing it back.
Deserialize Account Data #
To update an account's data, first, deserialize its data byte array into its
Rust type. Borrow the data field on the account to access it without taking
ownership. Then, use the try_from_slice_unchecked() function to deserialize
the data into the appropriate Rust type:
let mut account_data = try_from_slice_unchecked::<NoteState>(note_pda_account.data.borrow()).unwrap();

account_data.title = title;
account_data.body = rating;
account_data.id = id;
Serialize Account Data #
Once the Rust instance representing the account's data has been updated with the appropriate values, you can "save" the data on the account.
This is done with the serialize function on the instance of the Rust type you
created. You'll need to pass in a mutable reference to the account data. The
syntax here is tricky, so don't worry if you don't understand it completely.
Borrowing and references are two of the toughest concepts in Rust.
account_data.serialize(&mut &mut note_pda_account.data.borrow_mut()[..])?;The above example converts the account_data object to a byte array and sets it
to the data property on note_pda_account. This saves the updated
account_data variable to the data field of the new account. Now when a user
fetches the note_pda_account and deserializes the data, it will display the
updated data we've serialized into the account.
Iterators #
You may have noticed in the previous examples that we referenced note_creator
and didn't show where that came from.
To get access to this and other accounts, we use an
Iterator. An iterator
is a Rust trait used to give sequential access to each element in a collection
of values. Iterators are used in Solana programs to safely iterate over the list
of accounts passed into the program entry point through the accounts argument.
Rust Iterator #
The iterator pattern allows you to perform tasks on a sequence of items. The
iter() method creates an iterator object that references a collection. In
Rust, iterators are lazy and have no effect until methods that consume the
iterator are called. Use the next() function to get the next element in the
sequence, advancing the iterator each time.
let v1 = vec![1, 2, 3];

// Create the iterator over the vec
let v1_iter = v1.iter();

// Use the iterator to get the first item
let first_item = v1_iter.next();

// Use the iterator to get the second item
let second_item = v1_iter.next();
Solana Accounts Iterator #
In Solana programs, the instruction handler receives an accounts argument
containing AccountInfo items for all required accounts. To use these accounts
within your instruction handler, create an iterator with a mutable reference to
accounts. This approach allows you to process the account information
sequentially and access the data you need for your instruction handler logic.
Instead of using the iterator directly, you can pass the iterator to the
next_account_info function from the account_info module provided by the
solana_program crate.
For example, consider an instruction to create a new note in a note-taking program. This instruction would minimally require the following accounts:
- The account of the user creating the note.
- A PDA to store the note.
- The
system_programaccount to initialize a new account.
All three accounts would be passed into the program entry point via the
accounts argument. An iterator of accounts is then used to separate the
AccountInfo associated with each account to process the instruction.
Note: The &mut keyword indicates a mutable reference to the accounts
argument. For more details, refer to
references in Rust
and the mut keyword.
// Get Account iterator
let account_info_iter = &mut accounts.iter();

// Get accounts
let note_creator = next_account_info(account_info_iter)?;
let note_pda_account = next_account_info(account_info_iter)?;
let system_program = next_account_info(account_info_iter)?;
Lab #
This section introduces several new concepts. Let's practice them together by continuing with the Movie Review program from the previous lesson. Even if you're starting with this lesson, you should be able to follow along. We'll be using the Solana Playground to write, build, and deploy our code.
As a refresher, we are building a Solana program that lets users review movies. In the previous lesson deserialize instruction data, we deserialized the instruction data passed in by the user but did not store this data in an account. Let's now update our program to create new accounts to store the user's movie review.
1. Get the starter code #
If you didn't complete the lab from the last lesson or just want to make sure that you didn't miss anything, you can reference the starter code.
Our program currently includes an instruction.rs file used to deserialize the
instruction_data passed into the program entry point. We've also completed the
lib.rs file to the point where we can print our deserialized instruction data
to the program log using the msg! macro.
2. Create struct to represent account data #
Let's begin by creating a new file named state.rs.
This file will:
- Define the
structused to populate the data field of a new account. - Add
BorshSerializeandBorshDeserializetraits to this struct
First, import the necessary items from the borsh crate:
use borsh::{BorshSerialize, BorshDeserialize};Next, create the MovieAccountState struct, which defines the parameters that
each new movie review account will store in its data field. The struct includes
the following fields:
is_initialized- indicates whether the account has been initialized.rating- the user's rating of the movie.description- the user's description of the movie.title- the title of the movie being reviewed.
#[derive(BorshSerialize, BorshDeserialize, Default)]
pub struct MovieAccountState {
    pub is_initialized: bool,
    pub rating: u8,
    pub title: String,
    pub description: String,
}
3. Update lib.rs #
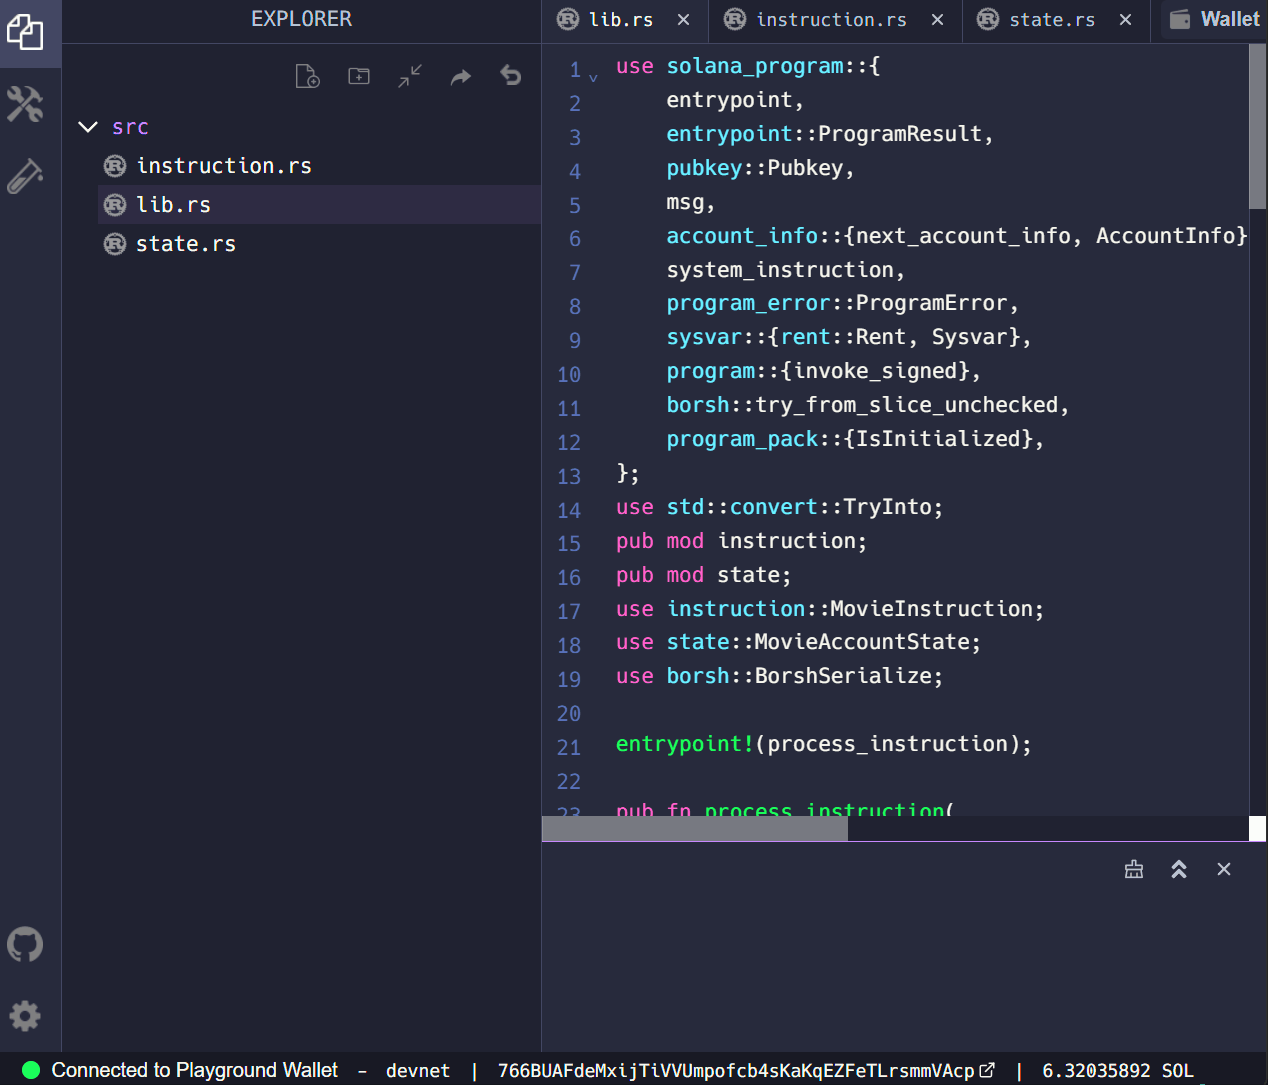
Next, update the lib.rs file. Start by importing everything needed to complete
the Movie Review program. For more details on each item, refer to
the solana_program crate.
use solana_program::{
    account_info::{next_account_info, AccountInfo},
    entrypoint,
    entrypoint::ProgramResult,
    msg,
    program::invoke_signed,
    pubkey::Pubkey,
    rent::Rent,
    system_instruction,
    sysvar::Sysvar,
};
use borsh::{BorshDeserialize, BorshSerialize};

pub mod instruction;
pub mod state;

use instruction::MovieInstruction;
use state::MovieAccountState;
4. Iterate through accounts #
Continue building out the add_movie_review function. Recall that an array of
accounts is passed into the add_movie_review function through a single
accounts argument. To process the instruction, iterate through accounts and
assign the AccountInfo for each account to a variable.
// Get Account iterator
let account_info_iter = &mut accounts.iter();

// Get accounts
let initializer = next_account_info(account_info_iter)?;
let pda_account = next_account_info(account_info_iter)?;
let system_program = next_account_info(account_info_iter)?;
5. Derive PDA #
Within the add_movie_review function, derive the PDA you expect the user to
have passed in. Even though pda_account should reference the same account, you
still need to call find_program_address() as the bump seed is required for the
derivation.
The PDA for each new account is derived using the initializer's public key and the movie title as seeds. This setup restricts each user to only one review per movie title but allows different users to review the same movie and the same user to review different movies.
// Derive PDA
let (pda, bump_seed) = Pubkey::find_program_address(
    &[initializer.key.as_ref(), title.as_bytes().as_ref()],
    program_id,
);
6. Calculate space and rent #
Calculate the rent required for the new account. Rent is the amount of lamports a user must allocate to an account for storing data on the Solana network. To calculate rent, first determine the space required by the new account.
The MovieAccountState struct has four fields. We will allocate 1 byte each for
rating and is_initialized. For both title and description we will
allocate space equal to 4 bytes plus the length of the string.
// Calculate account size required
let account_len: usize = 1 + 1 + (4 + title.len()) + (4 + description.len());

// Calculate rent required
let rent = Rent::get()?;
let rent_lamports = rent.minimum_balance(account_len);
7. Create new account #
Once rent is calculated and the PDA is verified, create the new account. To do
this, call the create_account instruction from the system program using a
Cross Program Invocation (CPI) with the invoke_signed function. Use
invoke_signed because the account is being created with a PDA and the Movie
The review program needs to “sign” the instructions.
// Create the account
invoke_signed(
    &system_instruction::create_account(
        initializer.key,
        pda_account.key,
        rent_lamports,
        account_len.try_into().unwrap(),
        program_id,
    ),
    &[
        initializer.clone(),
        pda_account.clone(),
        system_program.clone(),
    ],
    &[&[
        initializer.key.as_ref(),
        title.as_bytes().as_ref(),
        &[bump_seed],
    ]],
  )?;

msg!("PDA created: {}", pda);
8. Update account data #
Now that we've created a new account, we are ready to update the data field of
the new account using the format of the MovieAccountState struct from our
state.rs file. We first deserialize the account data from pda_account using
try_from_slice_unchecked, then set the values of each field.
msg!("Unpacking state account");
let mut account_data =
    MovieAccountState::try_from_slice(&pda_account.data.borrow())
        .unwrap_or(MovieAccountState::default());
msg!("Borrowed account data");

account_data.title = title;
account_data.rating = rating;
account_data.description = description;
account_data.is_initialized = true;
Finally, serialize the updated account_data into the data field of
pda_account.
msg!("Serializing account");
account_data.serialize(&mut &mut pda_account.data.borrow_mut()[..])?;
msg!("State account serialized");
9. Build and deploy #
You're now ready to build and deploy your program!
 Gif Build and Deploy Program
You can test your program by submitting a transaction with the right instruction
data. For that, feel free to use
this script
or the frontend we
built in the
Deserialize Custom Instruction Data lesson.
In both cases, set the program ID for your program in the appropriate file
web/components/ui/review-form.ts to make sure you're testing the right
program.
- If you're using the script, simply replace the value assigned to
movieProgramIdin theindex.tscomponent with the public key of the program you've deployed. - If you use the frontend, simply replace the
MOVIE_REVIEW_PROGRAM_IDin thereview-form.tsxcomponents with the address of the program you've deployed.
Then run the frontend, submit a view, and refresh the browser to see the review. If you need more time with this project to feel comfortable with these concepts, have a look at the solution code before continuing.
Challenge #
Now it's your turn to build something independently. Equipped with the concepts introduced in this lesson, you now know everything you'll need to recreate the entirety of the Student Intro program from Module 1.
The Student Intro program is a Solana Program that lets students introduce
themselves. The program takes a user's name and a short message as the
instruction_data and creates an account to store the data onchain.
Using what you've learned in this lesson, build out this program. In addition to taking a name a short message as instruction data, the program should:
- Create a separate account for each student
- Store
is_initializedas a boolean,nameas a string, andmsgas a string in each account
You can test your program by building the frontend we created in the Page, Order, and Filter Program Data lesson. Remember to replace the program ID in the frontend code with the one you've deployed.
Try to do this independently if you can! But if you get stuck, feel free to reference the solution code.
Push your code to GitHub and tell us what you thought of this lesson!