Summary #
- Programs store data in PDAs, which stands for Program Derived Address.
- PDAs do not have a corresponding secret key.
- To store and locate data, derive a PDA using the
findProgramAddress(seeds, programid)method. - You can get the accounts belonging to a program using
getProgramAccounts(programId). - Account data needs to be deserialized using the same layout used to store it
in the first place. You can use
@coral-xyz/borshto create a schema.
Lesson #
In the last lesson, we serialized program data that was subsequently stored onchain by a Solana program. In this lesson, we'll cover in greater detail how programs store data on the chain, how to retrieve data, and how to deserialize the data they store.
Programs #
As the saying goes, everything in Solana is an account. Even programs. Programs are accounts that store code and are marked as executable. This code can be executed by the Solana runtime when instructed to do so. A program address is a public keys on the Ed25519 Elliptic Curve. Like all public keys, they have corresponding secret keys.
Programs store data separately from their code. Programs store data in PDAs, which stands for Program Derived Address. PDAs are a unique concept to Solana, but the pattern is familiar:
- You can think of PDAs as a key value store, where the address is the key, and the data inside the account is the value.
- You can also consider PDAs as records in a database, with the address being the primary key used to look up the values inside.
PDAs combine a program address and some developer-chosen seeds to create addresses that store individual pieces of data. Since PDAs are addresses that lie off the Ed25519 Elliptic curve, PDAs don't have secret keys. Instead, PDAs can be signed for by the program address used to create them.
PDAs and the data inside them can be consistently found based on the program
address, bump, and seeds. To find a PDA, the program ID and seeds of the
developer's choice (like a string of text) are passed through the
findProgramAddress()
function.
Let's have a look at some examples...
Example: program with global state
A simple program that has global state - like our ping counter - might wish to
only use a single PDA, based on a simple seed phrase like "GLOBAL_STATE". If
the client wanted to read data from this PDA, it could derive the address using
the program ID and this same seed.
const [pda, bump] = await findProgramAddress(
  Buffer.from("GLOBAL_STATE"),
  programId,
);
Global state using a PDA
Example: program with user-specific data
In programs that store user-specific data, it's common to use a user's public key as the seed. This separates each user's data into its own PDA. The separation makes it possible for the client to locate each user's data by finding the address using the program ID and the user's public key.
import { PublicKey } from "@solana/web3.js";
const [pda, bump] = await PublicKey.findProgramAddressSync(
  [publicKey.toBuffer()],
  programId,
);
Per user state
Example: program with multiple data items per user #
When there are multiple data items per user, a program may use more seeds to create and identify accounts. For example, in a note-taking app there may be one account per note where each PDA is derived with the user's public key and the note's title.
const [pda, bump] = await PublicKey.findProgramAddressSync(
  [publicKey.toBuffer(), Buffer.from("Shopping list")],
  programId,
);
Global state using a PDA
In this example we can see both Alice and Bob have a note called 'Shopping List' but since we use their wallet address as one of the seeds, both these notes can exist at the same time.
Getting Multiple Program Accounts #
In addition to deriving addresses, you can fetch all accounts created by a
program using connection.getProgramAccounts(programId). This returns an array
of objects where each object has pubkey property representing the public key
of the account and an account property of type AccountInfo. You can use the
account property to get the account data.
const fetchProgramAccounts = async () => {
  try {
    const accounts = await connection.getProgramAccounts(programId);

    accounts.forEach(({ pubkey, account }) => {
      console.log("Account:", pubkey.toBase58());
      console.log("Data buffer:", account.data);
    });
  } catch (error) {
    console.error("Error fetching program accounts:", error);
  }
};

fetchProgramAccounts();
Deserializing program data #
The data property on an AccountInfo object is a buffer. To use it
efficiently, you'll need to write code that deserializes it into something more
usable. This is similar to the serialization process we covered last lesson.
Just as before, we'll use Borsh and @coral-xyz/borsh. If
you need a refresher on either of these, have a look at the previous lesson.
Deserializing requires knowledge of the account layout ahead of time. When creating your own programs, you will define how this is done as part of that process. Many programs also have documentation on how to deserialize the account data. Otherwise, if the program code is available you can look at the source and determine the structure that way.
To properly deserialize data from an onchain program, you will have to create a client-side schema mirroring how the data is stored in the account. For example, the following might be the schema for an account storing metadata about a player in an onchain game.
import * as borsh from "@coral-xyz/borsh";

borshAccountSchema = borsh.struct([
  borsh.bool("initialized"),
  borsh.u16("playerId"),
  borsh.str("name"),
]);
Once you have your layout defined, simply call .decode(buffer) on the schema.
import * as borsh from "@coral-xyz/borsh";

borshAccountSchema = borsh.struct([
  borsh.bool("initialized"),
  borsh.u16("playerId"),
  borsh.str("name"),
]);

const { playerId, name } = borshAccountSchema.decode(buffer);
Lab #
Let's practice this together by continuing to work on the Movie Review app from the last lesson. No worries if you're just jumping into this lesson - it should be possible to follow either way.
As a refresher, this project uses a Solana program deployed on Devnet which lets users review movies. Last lesson, we added functionality to the frontend skeleton letting users submit movie reviews but the list of reviews is still showing mock data. Let's fix that by fetching the program's storage accounts and deserializing the data stored there.
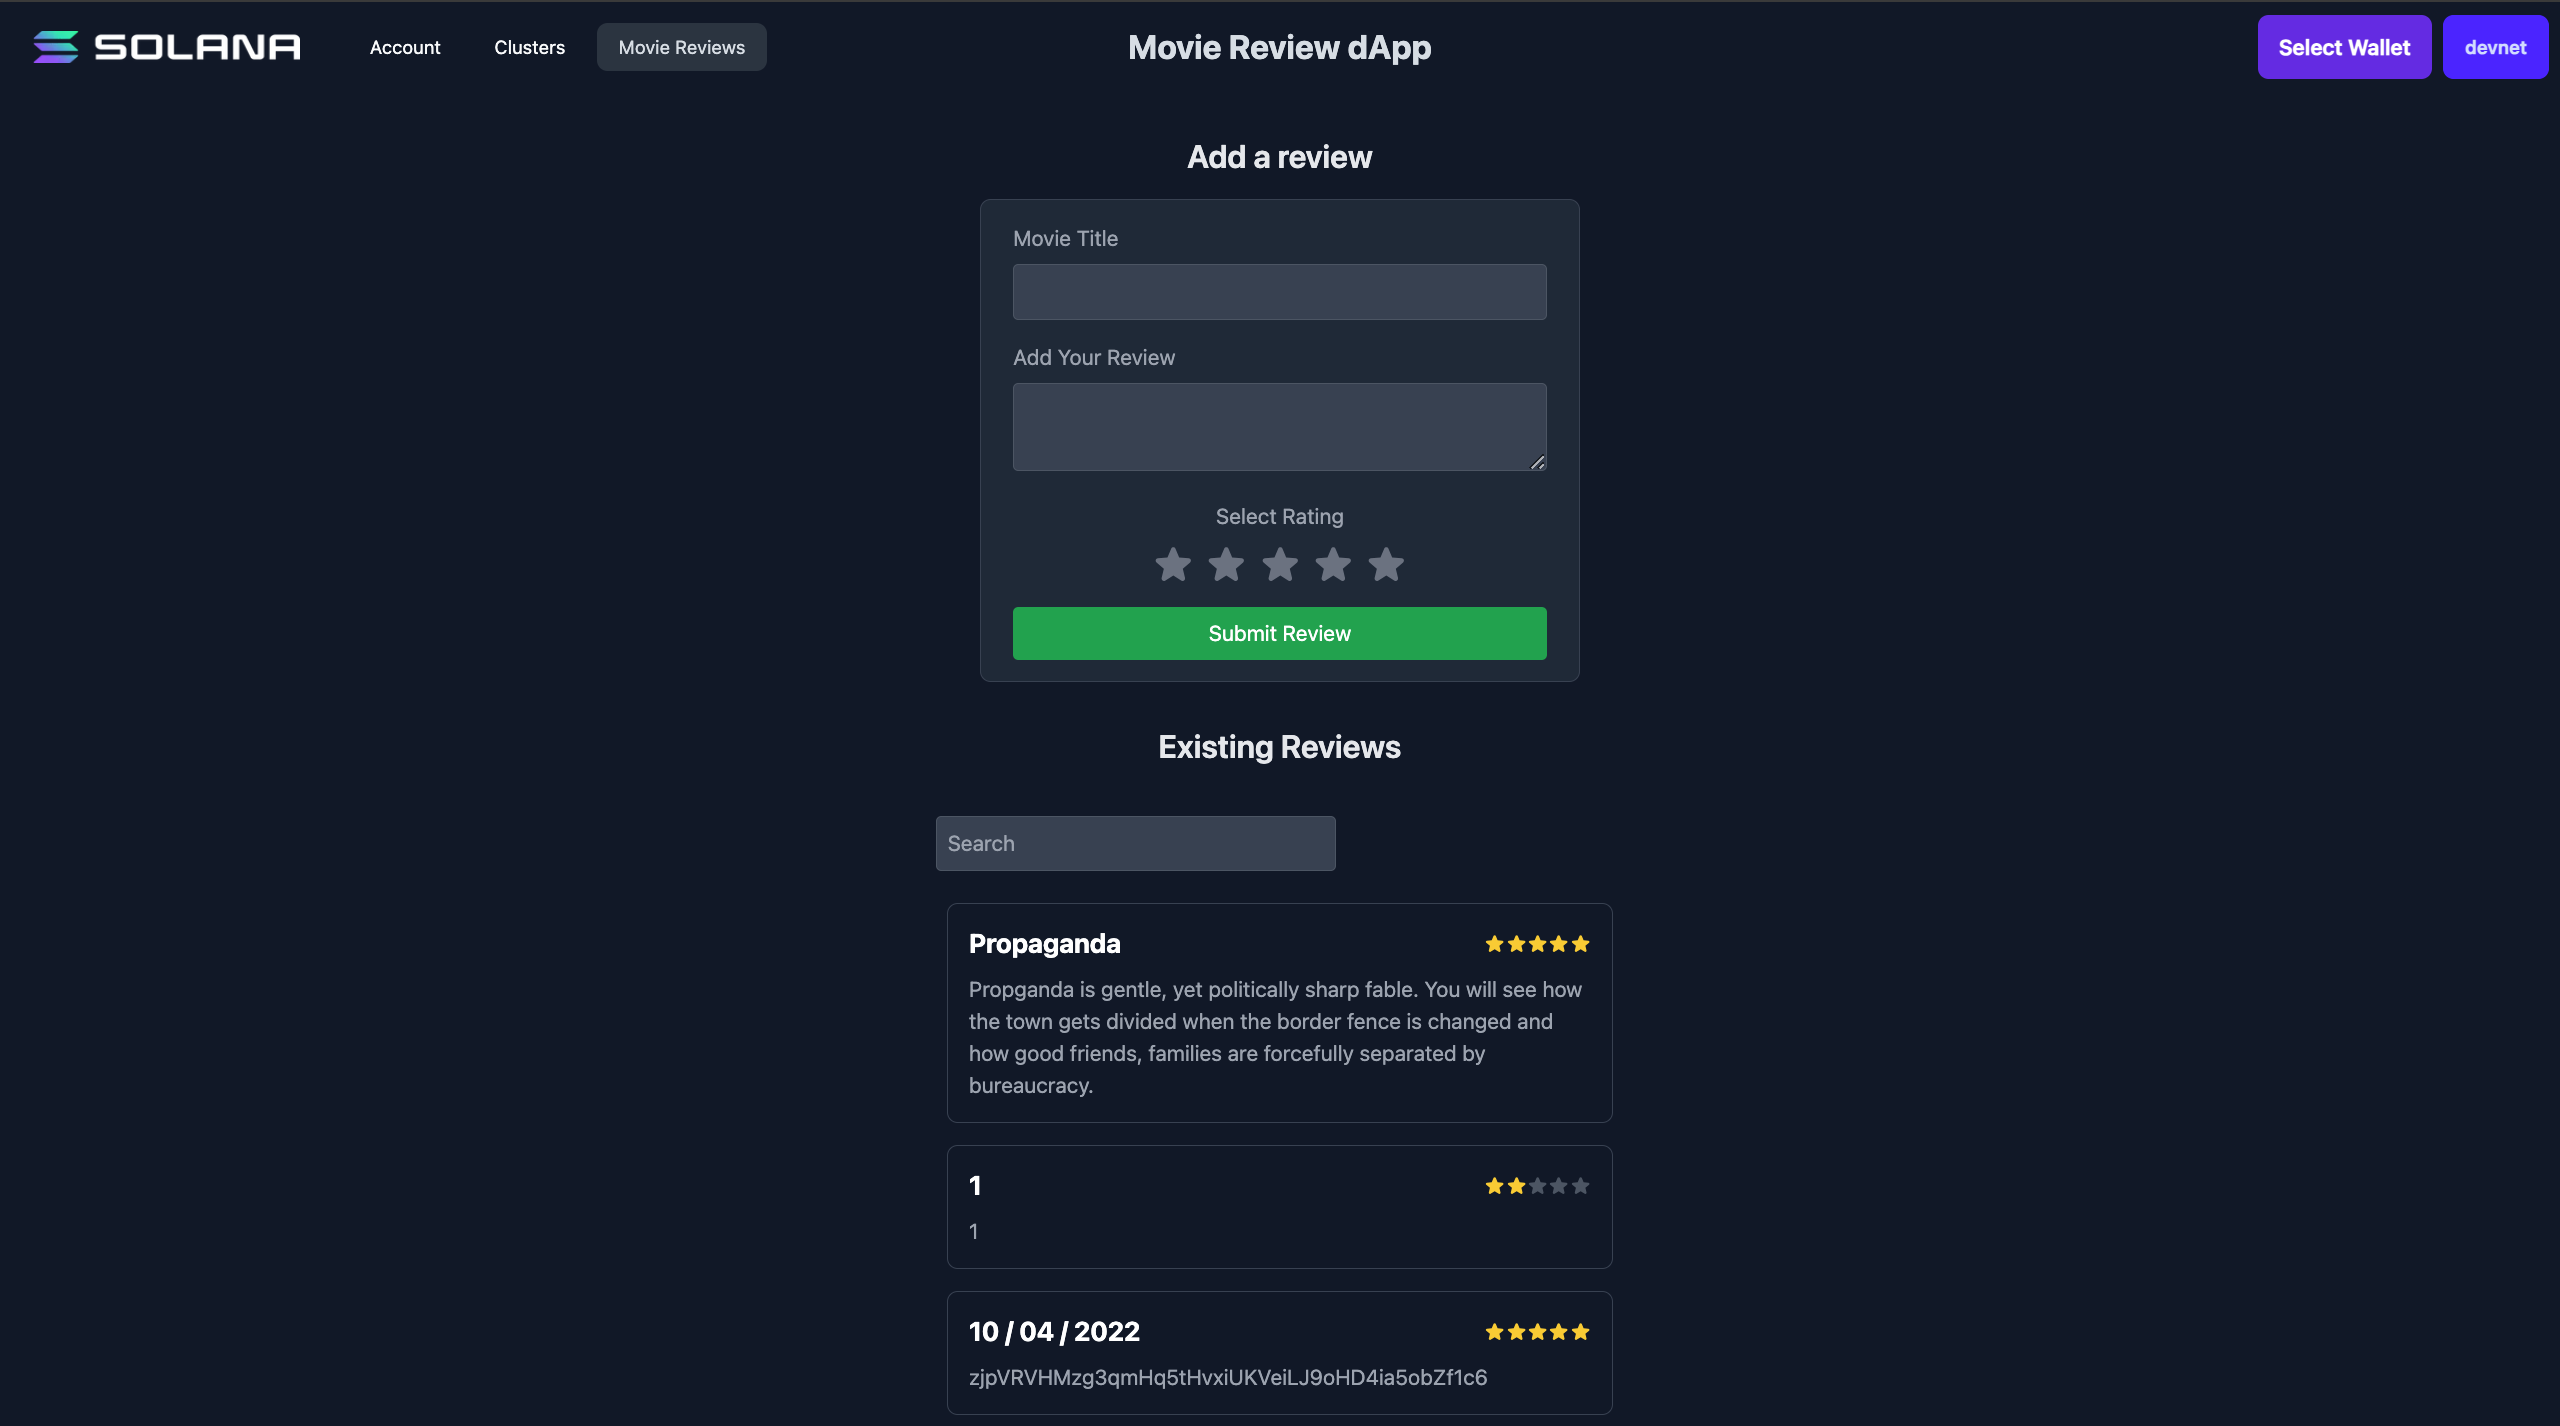 movie review frontend
1. Download the starter code #
If you didn't complete the lab from the last lesson or just want to make sure that you didn't miss anything, you can download the starter code.
The project is a fairly simple Next.js application. It includes the
WalletContextProvider we created in the Wallets lesson, a Card component for
displaying a movie review, a MovieList component that displays reviews in a
list, a Form component for submitting a new review, and a Movie.ts file that
contains a class definition for a Movie object.
Note that when you run npm run dev, the reviews displayed on the page are
mocks. We'll be swapping those out for the real deal.
2. Create the buffer layout #
Remember that to properly interact with a Solana program, you need to know how its data is structured. A reminder:
 Ed25519 curve showing Movie Review Program
The program's executable data is in a program account, but individual reviews
are kept in PDAs. We use findProgramAddress() to create a PDA that's unique
for every wallet, for every film title. We'll store the following data in the
PDA's data:
initializedas a boolean representing whether or not the account has been initialized.ratingas an unsigned, 8-bit integer representing the rating out of 5 that the reviewer gave the movie.titleas a string representing the title of the reviewed movie.descriptionas a string representing the written portion of the review.
Let's configure a borsh layout in the Movie class to represent the movie
account data layout. Start by importing @coral-xyz/borsh. Next, create a
borshAccountSchema static property and set it to the appropriate borsh
struct containing the properties listed above.
import * as borsh from '@coral-xyz/borsh'

export class Movie {
  title: string;
  rating: number;
  description: string;

  ...

  static borshAccountSchema = borsh.struct([
    borsh.bool('initialized'),
    borsh.u8('rating'),
    borsh.str('title'),
    borsh.str('description'),
  ])
}
Remember, the order here matters. It needs to match how the account data is structured.
3. Create a method to deserialize data #
Now that we have the buffer layout set up, let's create a static method in
Movie called deserialize that will take an optional Buffer and return a
Movie object or null.
import * as borsh from '@coral-xyz/borsh'

export class Movie {
  title: string;
  rating: number;
  description: string;

  ...

  static borshAccountSchema = borsh.struct([
    borsh.bool('initialized'),
    borsh.u8('rating'),
    borsh.str('title'),
    borsh.str('description'),
  ])

  static deserialize(buffer?: Buffer): Movie|null {
    if (!buffer) {
      return null
    }

    try {
      const { title, rating, description } =
        this.borshAccountSchema.decode(buffer);
      return new Movie(title, rating, description);
    } catch (error) {
      console.error("Deserialization error:", error);
      console.error("Buffer length:", buffer.length);
      console.error("Buffer data:", buffer.toString("hex"));
      return null;
    }
  }
}
The method first checks whether or not the buffer exists and returns null if
it doesn't. Next, it uses the layout we created to decode the buffer, then uses
the data to construct and return an instance of Movie. If the decoding fails,
the method logs the error and returns null.
4. Fetch movie review accounts #
Now that we have a way to deserialize account data, we need to actually fetch
the accounts. Open MovieList.tsx and import @solana/web3.js. Then, create a
new Connection inside the MovieList component. Finally, replace the line
setMovies(Movie.mocks) inside useEffect with a call to
connection.getProgramAccounts. Take the resulting array and convert it into an
array of movies and call setMovies.
import { Card } from "./Card";
import { FC, useEffect, useState } from "react";
import { Movie } from "../models/Movie";
import { PublicKey } from "@solana/web3.js"
import { useConnection } from "@solana/wallet-adapter-react";

const MOVIE_REVIEW_PROGRAM_ID = "CenYq6bDRB7p73EjsPEpiYN7uveyPUTdXkDkgUduboaN";

export const MovieList: FC = () => {
  const { connection } = useConnection();
  const [movies, setMovies] = useState<Movie[]>([]);

  useEffect(() => {
    const fetchProgramAccounts = async () => {
      try {
        const accounts = await connection.getProgramAccounts(new PublicKey(MOVIE_REVIEW_PROGRAM_ID));

        const movies: Movie[] = accounts.map(({ account }) => Movie.deserialize(account.data));

        setMovies(movies);
      } catch (error) {
        console.error("Error fetching program accounts:", error);
      }
    };
    fetchProgramAccounts();
  }, [connection]);


  return (
    <div>
      {movies.map((movie, i) => (
        <Card key={i} movie={movie} />
      ))}
    </div>
  );
};
At this point, you should be able to run the app and see the list of movie reviews retrieved from the program!
Depending on how many reviews have been submitted, this may take a long time to load or may lock up your browser entirely. But don't worry — next lesson we'll learn how to page and filter accounts so you can be more surgical with what you load.
If you need more time with this project to feel comfortable with these concepts, have a look at the solution code before continuing.
Challenge #
Now it's your turn to build something independently. Last lesson, you worked on
the Student Intros app to serialize instruction data and send a new intro to the
network. Now, it's time to fetch and deserialize the program's account data.
Remember, the Solana program that supports this is at
HdE95RSVsdb315jfJtaykXhXY478h53X6okDupVfY9yf.
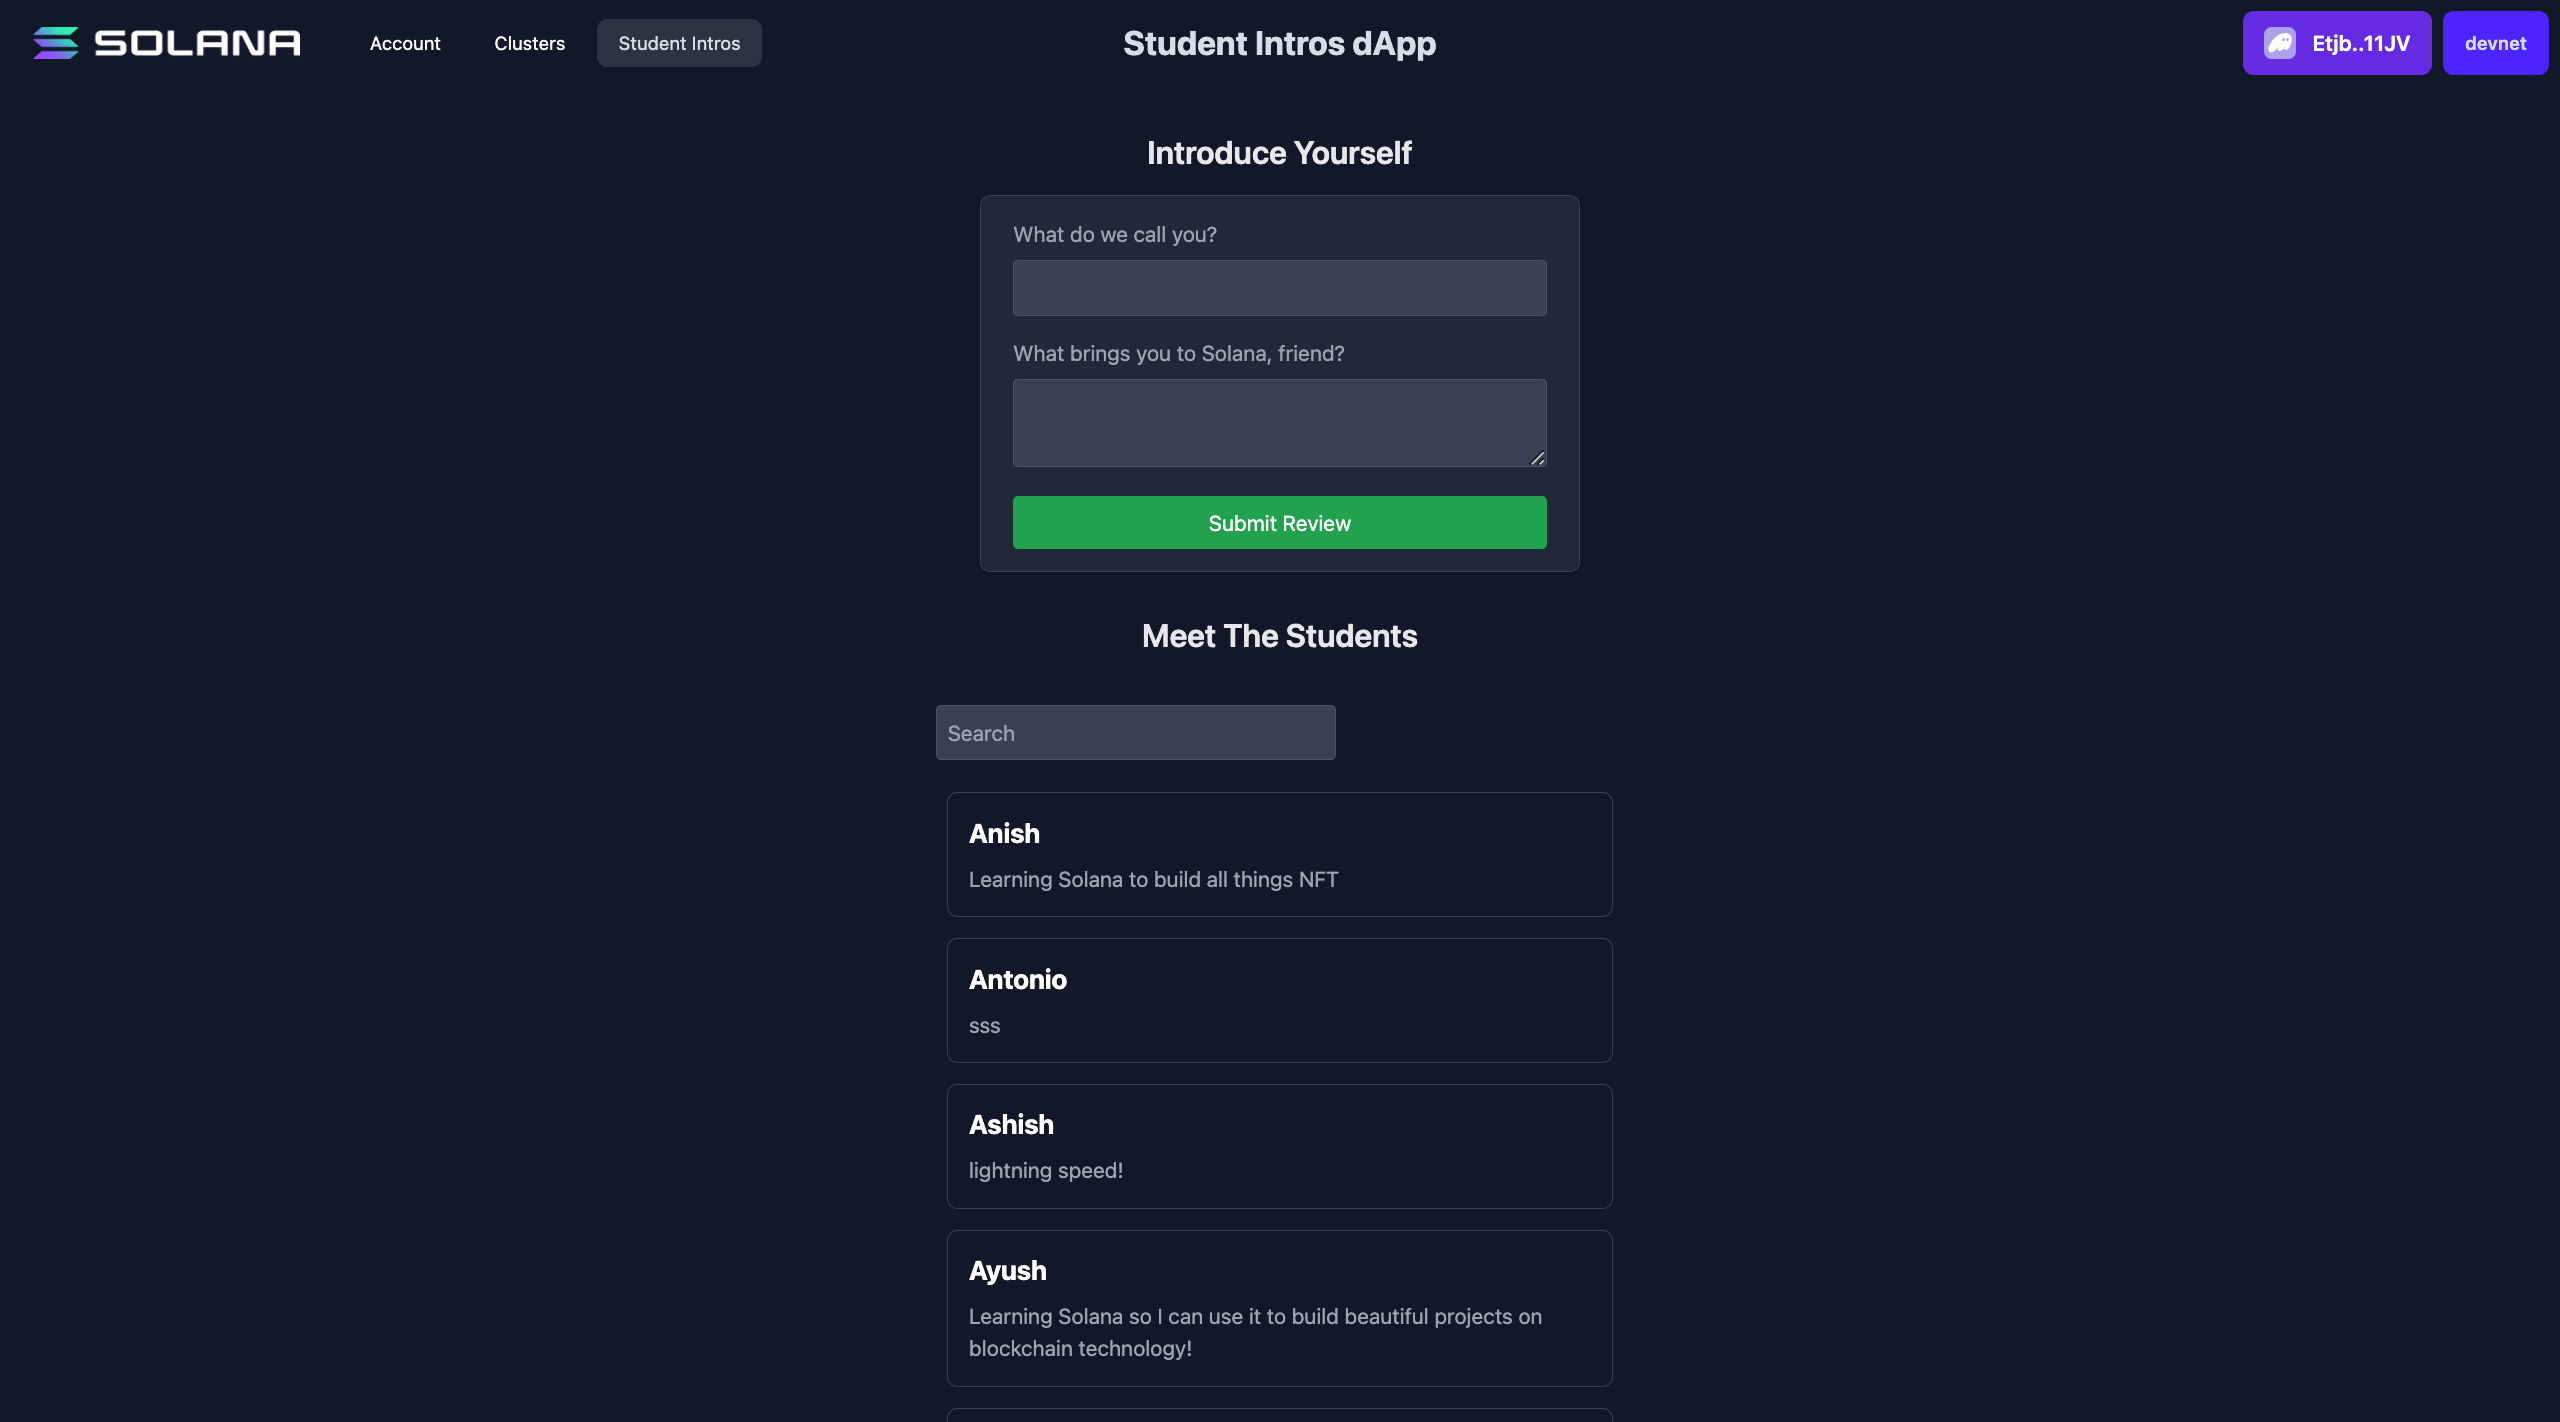 Student Intros frontend
- You can build this from scratch or you can download the starter code.
- Create the account buffer layout in
StudentIntro.ts. The account data contains:initializedas an unsigned, 8-bit integer representing the instruction to run (should be 1).nameas a string representing the student's name.messageas a string representing the message the student shared about their Solana journey.
- Create a static method in
StudentIntro.tsthat will use the buffer layout to deserialize an account data buffer into aStudentIntroobject. - In the
StudentIntroListcomponent'suseEffect, get the program's accounts and deserialize their data into a list ofStudentIntroobjects. - Instead of mock data, you should now be seeing student introductions from the network!
If you get really stumped, feel free to check out the solution code.
As always, get creative with these challenges and take them beyond the instructions if you want!
Push your code to GitHub and tell us what you thought of this lesson!